Building a Post Frame Home | Spray Foam and Interior Framing Part 2 | Remington | Part 17
- MR Post Frame
- Feb 19, 2024
- 3 min read
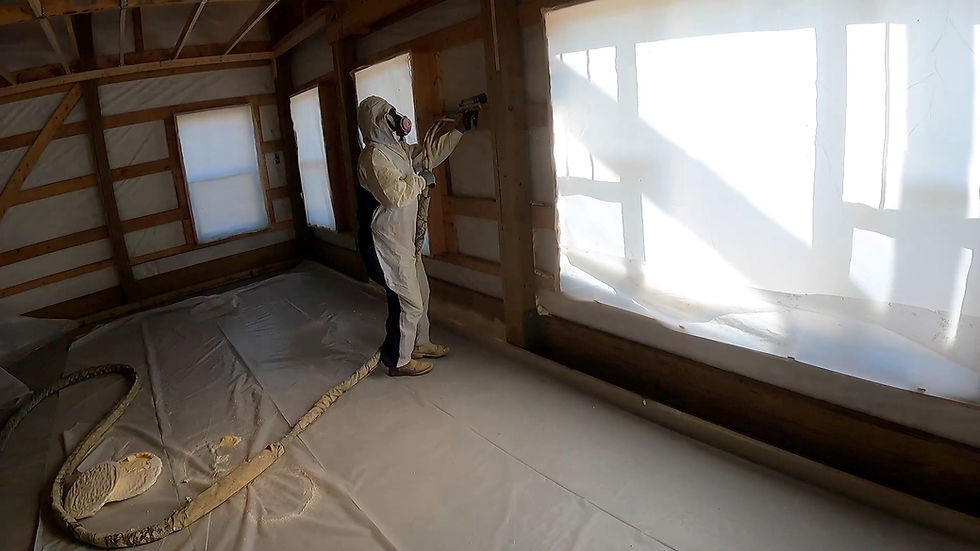
Hey everyone! Today's update is all about the Remington build, and we're extremely excited because we're getting spray foam done. Three inches of closed-cell goodness is going into this build. Our spray foam expert, who randomly introduced himself to me one day, is doing an amazing job. We're planning to stick with him for all our spray foam needs moving forward.
Now, let's dive into the details. We're starting by filling behind these columns, building it out as it cures. The spray foam application is a crucial step in the process.

As soon as we wrapped up the spray foam, I had a chat with our spray foam guy. We're planning to create a video and a post covering the basics when time allows. We've got a solid three inches of closed-cell insulation. At the bottom, the girt is filled, attaching to the ICF form, sealing the void, and continuing the insulation up the wall. Same story at the top - the entire cavity is nicely filled. Now we have a well-sealed envelope, promising an efficient house even with average windows.
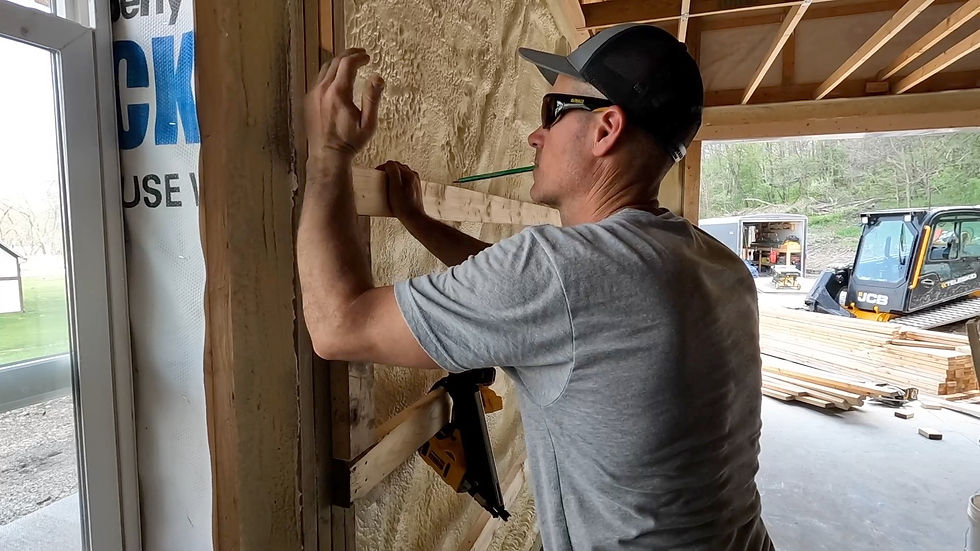
We allow the spray foam to set up for a few days and then we’re ready to get to the framing. Let's get started with the interior girts. As we frame up the interior, our initial focus is on the interior girts. For the first one, aligning it with the top edge of the window is crucial since most windows share this height. This approach serves a dual purpose, making it efficient. Positioned two feet up, we also need a board across, making it an ideal starting point.

We've mounted the laser to the wall, aligned it, and marked just above the red on all the posts. Afterward, we take it down and run our first girts. Using a laser ensures precision. Once the first one is in place, we create spacer blocks, simplifying the process for the remaining ones. This way, the subsequent girts will align perfectly, leveraging the accuracy of the initial placement.
Moving on, we're framing up the walls, giving priority to the interior girts. The first one is set with a laser, and the rest are planned accordingly. Spacer blocks help streamline the process, making it efficient and accurate. We're methodically progressing to ensure the framing is solid and well-aligned.
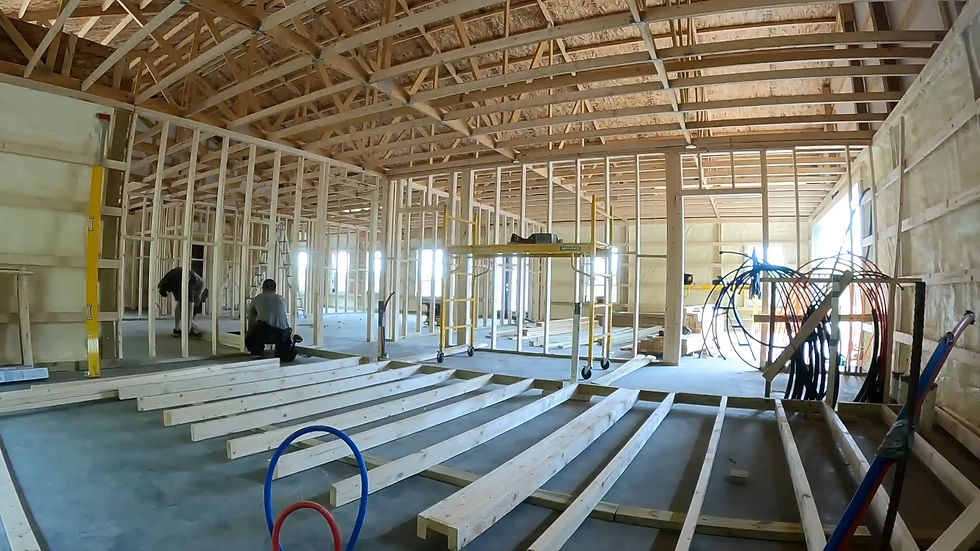
With the walls in place, our attention shifts to laying out the walls. Starting at one end of the house, where we have two bedrooms, a bathroom, and a small hall closet, we carefully mark and plan the layout. The emphasis is on precision, especially where plumbing is involved. This meticulous approach ensures that the walls hit precisely where needed.

A layout laser proves useful in marking the walls, providing a clear reference for aligning them during installation. With the layout established, we move on to framing the walls. Each step is executed with attention to detail, ensuring that the framing process is well-coordinated.
As we progress, we encounter the need to cut out door openings. Pre-cutting these openings makes the process smoother, especially when using a sawzall. The focus is on maintaining accuracy and efficiency in every step of the framing process. The installation of pocket doors requires careful consideration. Despite challenges, we use wood products for pocket doors, a reliable choice for our builds. Installing them on concrete demands additional attention, but with the right approach, we ensure a smooth and secure fit.
Completing the framing process, we take you on a walkthrough of the internal framing. From utility rooms to bedrooms, bathrooms, and the kitchen slider, every aspect is carefully considered. Attention to detail, precision in measurements, and the use of reliable materials characterize our framing process.

In the utility room, we incorporate in-floor heat and carefully plan for water and electrical lines. The blocking in the walls adds structural stability, while thoughtful considerations, such as using a double 2x4 for top plates, contribute to the overall integrity of the build. The laundry room, master bedroom, bathroom, and other areas are strategically designed, keeping in mind the importance of proper framing. Where needed, additional support, like a two by six, is added for the attachment of drywall.
Wrapping up the internal framing for the Remington, we want to make sure you understand that the process involves precision, thoughtful planning, and a commitment to delivering a solid and well-structured foundation for the building.
Also for those of you who are new to our page, we've got a Patreon where we dive into different topics every month. You can ask questions in advance, and we'll cover them in our videos. It's a great resource, especially for those looking to tackle their own builds.
Thank you,
MR Post Frame

Patreon Group:
Interested in tackling your build on your own? If you want to explore the possibility of being your GC or self-building, our Patreon membership is for you! It's a community of like-minded people offering support, discounts, Q/A, and more.